Professional Results Come From Preparation
Installing a backyard movie screen is not only about getting a white surface upright. A professional-looking result depends on where the screen sits, how it handles wind, whether the image stays flat, how power is routed, where viewers sit, and how quickly the setup can be repeated. The best installations feel relaxed because the technical decisions have already been made. The screen is level, the frame is secure, the projector aligns naturally, and the audio reaches the audience without blasting the neighborhood.
Pick the Location Before Choosing the Screen
Location shapes every other decision. Look for a spot with manageable ambient light, comfortable seating distance, safe power access, and enough depth for the projector. The screen should not face direct sunset glare if evening viewing begins early, and the area behind the screen should not distract viewers with bright windows, busy streets, or landscape lights.
Ground conditions matter too. A lawn may be comfortable for seating but uneven for frames and projector tables. A patio may be level but reflective or limited in depth. Wind exposure changes from one part of a yard to another. Spend time in the space at the hour you plan to watch, because the yard can feel very different at noon, dusk, and night.
A professional setup also respects neighbors. Aim speakers and screen activity toward your own gathering area, and avoid placing the audience where sound carries directly over a fence.
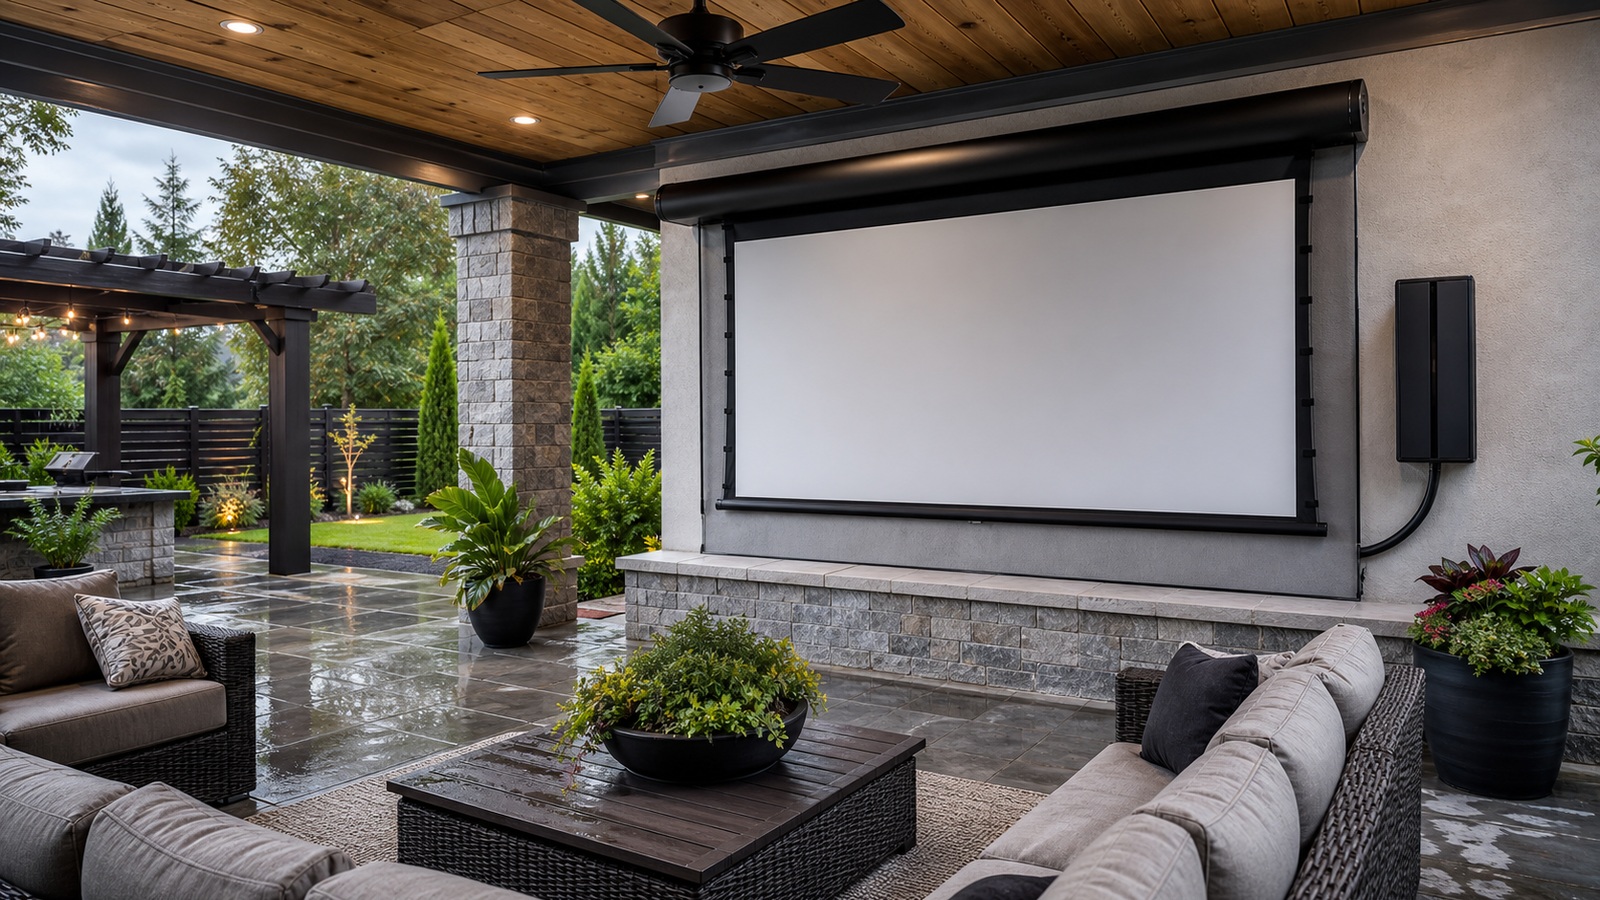
Choose a Screen System That Can Stay Flat
A flat screen is essential for a clean image. Wrinkles, waves, and sagging edges make even a good projector look cheap. Fixed frames, tensioned portable screens, and well-built retractable screens can all perform well, but the screen must match the location and setup style.
Temporary screens should assemble consistently without heroic effort. If the frame is difficult to square or the fabric takes too long to tension, movie night becomes a chore. Permanent or semi-permanent screens need weather resistance, secure mounting, and a plan for protection when not in use.
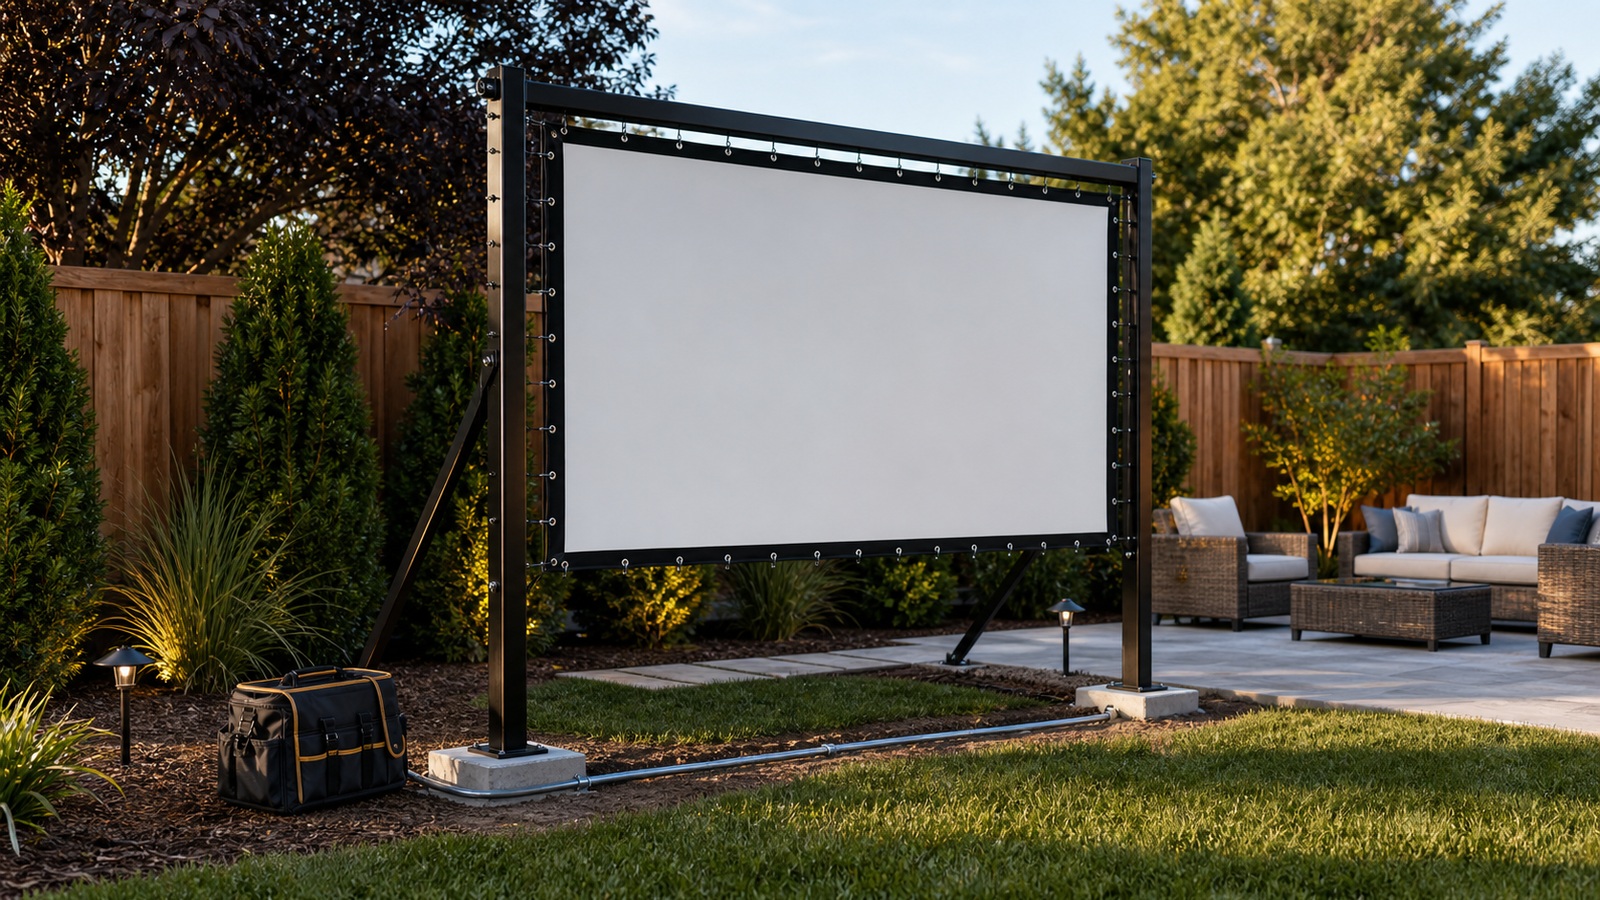
Secure the Frame Against Movement
Wind is the backyard installer’s biggest enemy. Even a light breeze can ripple fabric or push a freestanding frame out of alignment. Professional-looking setups use stakes, weighted bases, guy lines, wall mounts, or structural supports appropriate to the screen type. The goal is stability without creating trip hazards.
Anchoring should be neat as well as strong. Bright ropes, loose stakes, and scattered weights can make the area feel improvised. Low-profile anchors, tidy lines, and thoughtful placement keep the setup safe while preserving the event-like atmosphere.
Do not ignore teardown. If the screen must come down after each use, the anchoring system should be easy to release and store. A secure system that takes too long to manage will not be used consistently.
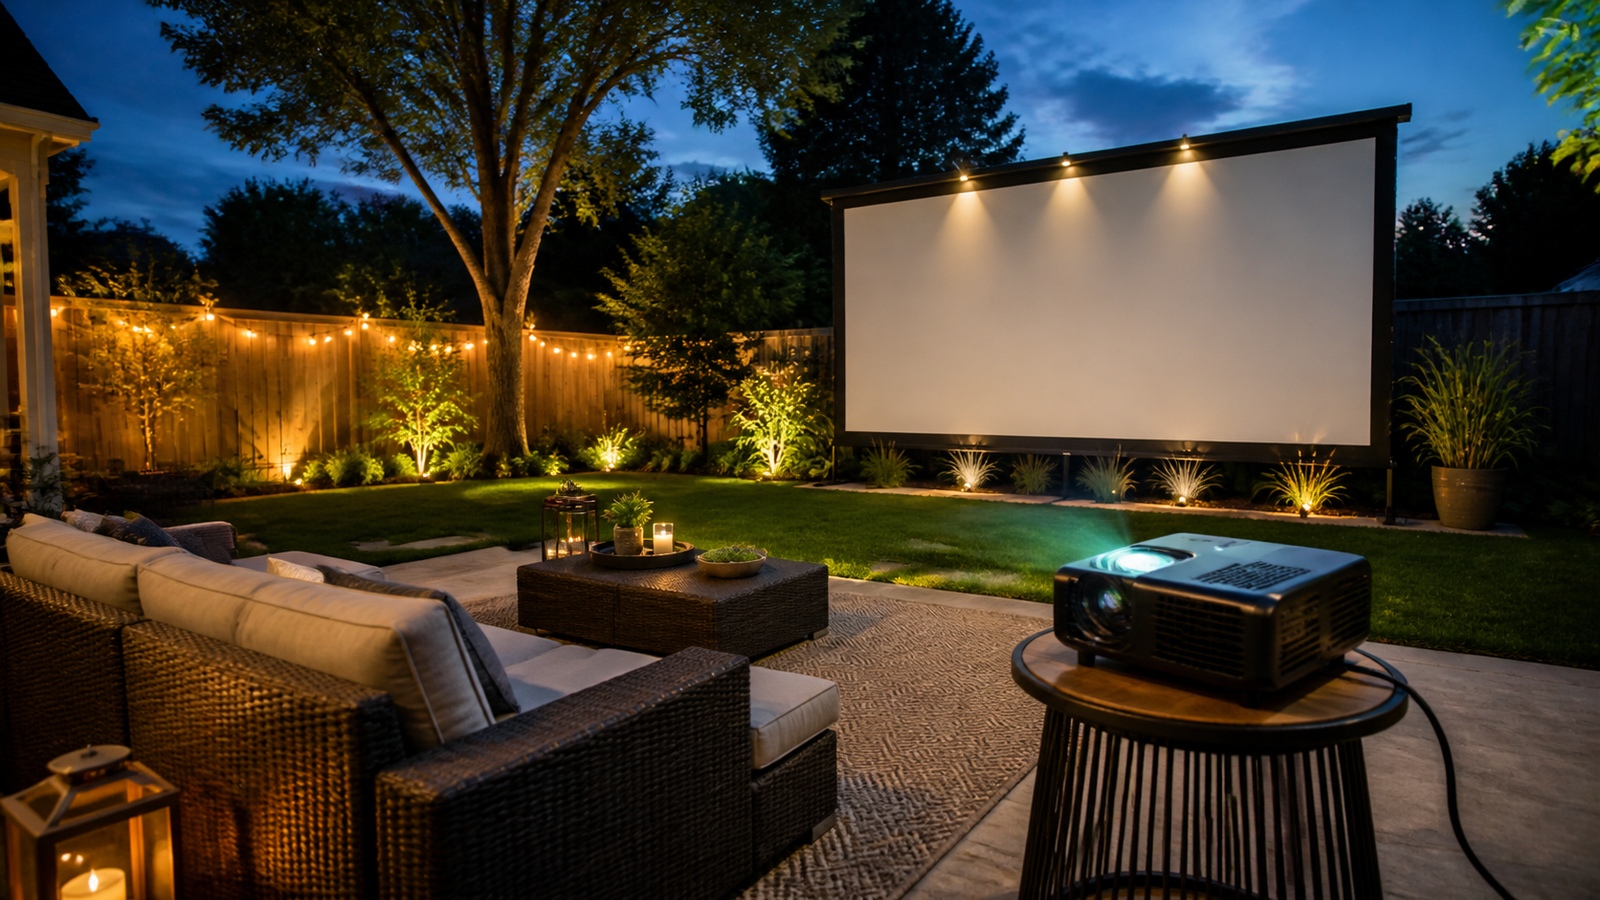
Align Projector, Seating, and Audio as One System
Professional results come from geometry. The projector should sit at the right distance and height for the screen, with minimal keystone correction. Seating should allow viewers to see the whole image comfortably. Speakers should be close enough to the audience that dialogue is clear at reasonable volume.
- Mark projector placement once the image is dialed in.
- Keep the beam path away from walkways.
- Place speakers forward of the audience when possible.
- Use cable covers where cords cross traffic areas.
A backyard setup feels polished when people can move naturally without disrupting the picture or tripping over the system.
Build a Repeatable Movie-Night Kit
The final professional touch is repeatability. Store the screen hardware, projector cables, extension cords, remote, speaker cables, stakes, and small tools together. Label what goes where. Keep a checklist if the setup has several steps. This is not overkill; it is how the second movie night feels as smooth as the first.
Weather planning belongs in the kit. Include covers, microfiber cloths, storage bags, and a plan for sudden wind or rain. Use outdoor-rated power equipment and avoid leaving electronics outside overnight unless they are designed for it.
A backyard movie screen does not need to be permanent to feel professional. It needs to be stable, flat, safe, aligned, and easy to repeat. When those fundamentals are handled, the screen fades into the background and the night becomes about the movie, the food, and the people gathered around it.
Build Around the First Ten Minutes of Setup
The first ten minutes decide whether a backyard screen feels professional or improvised. If the frame pieces are easy to identify, the screen tensioning sequence is obvious, the projector has a marked position, and cables are already grouped, the night starts calmly. If people are searching for stakes, untangling cords, and guessing where the projector goes, the setup feels messy before the movie begins.
A professional approach treats setup like a small event system. Components are stored together, heavy items have assigned carriers, and the order of operations is repeatable. Screen first, anchor second, projector third, audio fourth, final focus last. The exact sequence can vary, but having one prevents needless rework.
This is especially helpful when friends or family help. Clear labels and simple steps allow others to participate without being supervised constantly.
Respect Wind More Than the Forecast Suggests
A calm evening can still produce small gusts that move a screen. Because movie screens are broad and lightweight, they catch air easily. Even if the frame does not fall, slight movement can make the image ripple or drift out of alignment. Professional-looking installs assume wind will appear and prepare for it.
Anchors should match the ground surface. Lawn installations may use stakes or weighted feet. Patio installations may need sandbags, weighted bases, or structural attachment points. Lines should be visible enough to avoid trips but tidy enough not to dominate the space. If wind rises beyond the screen’s safe range, the right answer is to stop and protect the equipment.
Wind planning also affects screen choice. A smaller or more rigid screen may outperform a huge flexible surface in a breezy yard. Stability is part of image quality.
Make the Area Feel Intentional After Dark
A backyard screen installation is not only technical. It should feel like a place to gather. Low pathway lights, organized seating, a defined snack area, and a clear route to the house make the event feel planned. The screen should be the focal point, but the surrounding space supports the experience.
Avoid shining decorative lights directly toward the screen. Instead, light steps, table edges, and walking paths. Keep storage bins and tool bags out of sight once setup is complete. Small touches like blankets, side tables, and trash placement make the area easier to use without cluttering the image.
When the environment feels intentional, guests notice the movie rather than the equipment. That is the mark of a backyard screen installed like a pro.
Finish With a Walkthrough Before Guests Arrive
A professional installer does not stop when the screen is standing. The final step is a walkthrough. Start the projector, play real content, check focus, listen from every seating area, walk the paths people will use, and look for cords, stakes, shadows, or glare that could become problems. This rehearsal turns hidden issues into simple fixes.
The walkthrough should include someone who did not set up the system. Ask them where they would walk, where they would place a drink, whether they can hear dialogue, and whether anything feels unstable. Fresh eyes catch practical problems that the installer may miss after focusing on hardware.
Check the teardown path too. Know where the screen fabric goes, how anchors are removed, how cables are wrapped, and where electronics are stored if weather changes. A setup is not truly professional if it can only be assembled, not safely taken down.
Lighting deserves a final look after dark. Path lights should reveal steps and cords without washing the screen. Snack tables need enough light to be useful. The screen surface should remain the brightest visual element during the movie. Small adjustments here can make the whole backyard feel more polished.
A backyard movie screen installed like a pro is stable, repeatable, and comfortable. It looks simple because the decisions have been made before guests arrive. That preparation lets the evening feel easy, which is the whole point of bringing the theater outside.
Document the Setup Once It Works
After the first successful movie night, document the setup. Take photos of the screen position, anchor points, projector placement, cable routes, speaker locations, and storage layout. Record any picture settings, audio delay adjustments, and notes about what time the image became bright enough. This turns one good night into a repeatable system.
Documentation is especially useful when the setup is seasonal or shared by multiple people. Someone else can assemble the screen without guessing. Replacement parts can be ordered more easily. If a cable fails, the route and length are known. If wind affected the screen, notes can guide better anchoring next time.
Keep the documentation simple. A folder of photos and a short checklist may be enough. The goal is not to turn movie night into a manual; it is to preserve the decisions that made the setup work. Future you will appreciate not having to solve the same problems again.
Professional results often come from habits like this. Measure once, mark once, label once, and the backyard theater becomes easier every time it is used.
A Professional Setup Feels Calm
The point of professional preparation is not to make backyard movies feel formal. It is to make them feel calm. When the screen is stable, the image is square, cords are safe, and the speakers are ready, people can settle in without watching the host troubleshoot.
That calm feeling comes from repeatable decisions. The same anchor points, projector marks, cable routes, and storage routine turn a complicated setup into a familiar one. Each movie night becomes easier because the system remembers what worked.
A backyard screen installed like a pro ultimately disappears into the event. Guests notice the movie, the weather, the food, and the company, which is exactly how it should be. The screen, anchors, cords, and speakers are still doing important work, but they are no longer asking for attention. That quiet competence is the difference between a one-time novelty and a backyard tradition. Once the setup feels repeatable, the outdoor theater becomes part of how the home gathers. The more ordinary the setup process becomes, the more special the actual viewing night can feel, because the work has already been handled. A good installation gives the host confidence before the first guest arrives and gives everyone else a reason to settle in with ease.
After the night ends, teardown should be just as clear as setup. Dry the screen if needed, coil cords loosely, store anchors together, and put the projector somewhere protected. The next movie night starts with how well the last one was packed away. Good storage preserves the screen surface, protects small parts, and keeps the routine easy for whoever sets it up next without hunting for missing hardware later in the outdoor season again.
TV Top 10 Product Reviews
Explore Philo Street’s TV Top 10 Product Reviews! Discover the top-rated TVs, access comprehensive reviews, and find the perfect screen for your space.